Do you want to build a custom business theme with Genesis Sample from the scratch? Building a custom child theme doesn’t have to be very difficult if you follow the right approach. This guide aims to walk you through the basic steps of building a custom business theme on Genesis Sample (version 2.6.0).
Since this is going to be a long post, let’s break this down upfront.
Step #1: Create a Widgetized Front Page
Step #2: Add Background Images via Customizer
Step #3: Add Hero Images on Posts/Pages
Step #4: Gridify Blog Archives
Step #5: Show Related Posts
Step #1: Create a Widgetized Front Page
- Create a New Page and Name it Blog
- Don’t Apply the Default Genesis Blog Template to it
- Go to Settings > Reading and Choose Sample Page as your Homepage and Blog Page as your Posts Page
- Click on Save Changes button
For our Widgetized Front Page, let’s create 4 widgetized sections such as:
- Hero Widget
- Pricing Table Widget
- Featured Services Widget
- Featured Blog Widget
Just So You Know: The functions file of Genesis Sample Theme (version 2.6.0) has 281 lines of php code. For our business theme, we may need to modify existing code and/or add new code snippets as well.
In order to create widgetized front page, we need to:
Task # 1 — create a front-page.php template
Task #2 — add necessary code to front-page.php
Task #3 — add necessary code snippets to functions file
Task #4 — add demo content to widgets
Task #5 — add css via WordPress customizer
Let’s do it
Task # 1 — create a front-page.php template
Within Genesis Sample child theme folder, create a new file and name it “front-page.php”.
Task #2 — add necessary code to front-page.php
Add the following code to it
Task #3 — add necessary code snippets to functions file
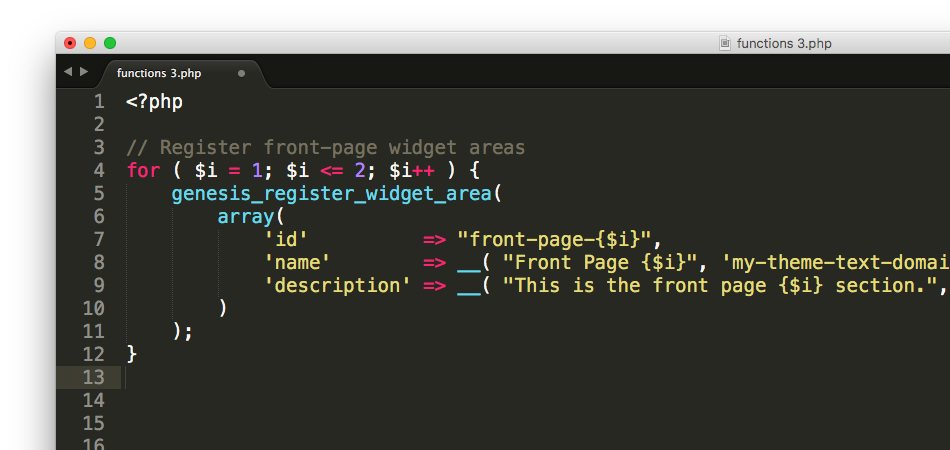
In order to register the 4 widgets for our business theme, we need to add the following code snippets to our functions.php file.
To display the widgets, we need to add the following code snippets to our functions.php file.
Task #4 — add demo content to widgets
Now that the widgets are up and running, let’s add some demo content. Copy and paste the demo content for each section given below.
Note: I’ve used both default text widgets and a plugin called (Classic Text Widget) to confiture the front page widgets. If you do it differently, you might want to tweak the css a little bit.
Task #5 — add css via WordPress customizer
Now, that the content is inserted, let’s add some css for the front page and see how it works.
Note: If you want to change the css within your child theme’s stylesheet, that’s fine. However, if you’re not sure, you might want to add the css to WordPress Customizer. On Customizer, you should be able to see the changes live and minor tweaks accordingly. Moreover, the design might look different based on your font combinations as well.
Step #2: Add Background Images via Customizer
Now that we’re done with adding content to our front-page widgets with some basic css, let’s add the functionality to add background images via Customizer.
Task #1: Add Background Images via lib/customize.php
Task #2: Display Background Images via lib/output.php
Let’s do it.
Task #1: Add Background Images via lib/customize.php
In order to add background images to our front-page widget sections, we need to add the following code snippet to customize.php file residing inside the lib folder of our child theme.
Task #2: Display Background Images via lib/output.php
Let’s add the following code snippet at the bottom of our output.php file residing inside the lib folder.
As a result of this, we should see a “Featured Background Images” section in the WordPress Customizer, which when clicked allows you to upload four different background images of your choice.
Step #3: Add Hero Images on Posts/Pages
Now that we’re almost finished with the front-page, let’s shift our focus to the other posts and pages.
In order to display featured image as the hero image on blog posts and individual pages (such as ‘about us’ and ‘contact us’), overlaid by entry-title and post/page excerpts, we’ll perform the following tasks:
Task #1 — Add Excerpt support to Pages
Task #2 — Display Excerpt as Post/Page Subtitle
Task #3 — Register a Custom Image Size for Hero Images
Task #4 — Display Featured Image as Hero Image
Let’s do this.
Task #1 — Add Excerpt support to Pages
Add the following code snippet to your functions file.
Task #2 — Display Excerpt as Subtitle in Post/Page except Front Page
The following code ensure the excerpts are displayed only on posts or pages, but not on our widgetized front-page.
Task #3 — Register a Custom Image Size for Hero Images
The following code creates a custom image size to be used as Hero Image.
// Register a custom image size for hero images
 add_image_size( 'post-image', 900, 450, true );
Task #4 — Display Featured Image as Hero Image
The following code snippet ensures the entry meta, entry title and subtitle are displayed over the hero image. We also use a transparent overlay for adding visual clarity.
Step #4: Gridify Blog Archives
Grid view is one of the most popular ways to showcase blog archives these days. I’ve already written a post on how to gridify blog archives. We will just follow the same approach for our business theme.
Copy and paste the following copy snippet at the bottom of your functions file to display your blog archives in grid format.
Note: If you want to relocate the entry-title, entry meta and featured images of the gridified blog archives, you can do so with the following code snippet.
Of course, you will need to customize the look with css tweaks. Here’s what I’ve done for this theme:
Step #5: Show Related Posts
You want to show similar posts and related posts below your blog entry for better user experience. I’ve already covered this in the past. We’ll use the same guide to display related posts here in this theme.
Note: You can change the number of related posts you want to show by changing the number inside the code. Moreover, you can also choose to show related posts based on category as well as tags.
That’s it! You should have created a custom business theme by now.
If you have any questions, please, let me know in the comments below. I’ll be glad to help!


Fantastic post !! I loved it. Thanks for this kind of post. Just a question. How do you force the layout of the blog page?
if (is_home()){
add_filter( ‘genesis_pre_get_option_site_layout’, ‘__genesis_return_full_width_content’ );
}
but in which hook, i´ll do the add_action?
Thank you
Regards